Partner Details
The partner detail page shows all information about a partner and allows you to make changes.
Accessing Partner Details
Open a partner's details by:
- Clicking on a partner row in the list
- Clicking the View (eye) icon on a partner row
- Navigating directly to
/partners/{id}
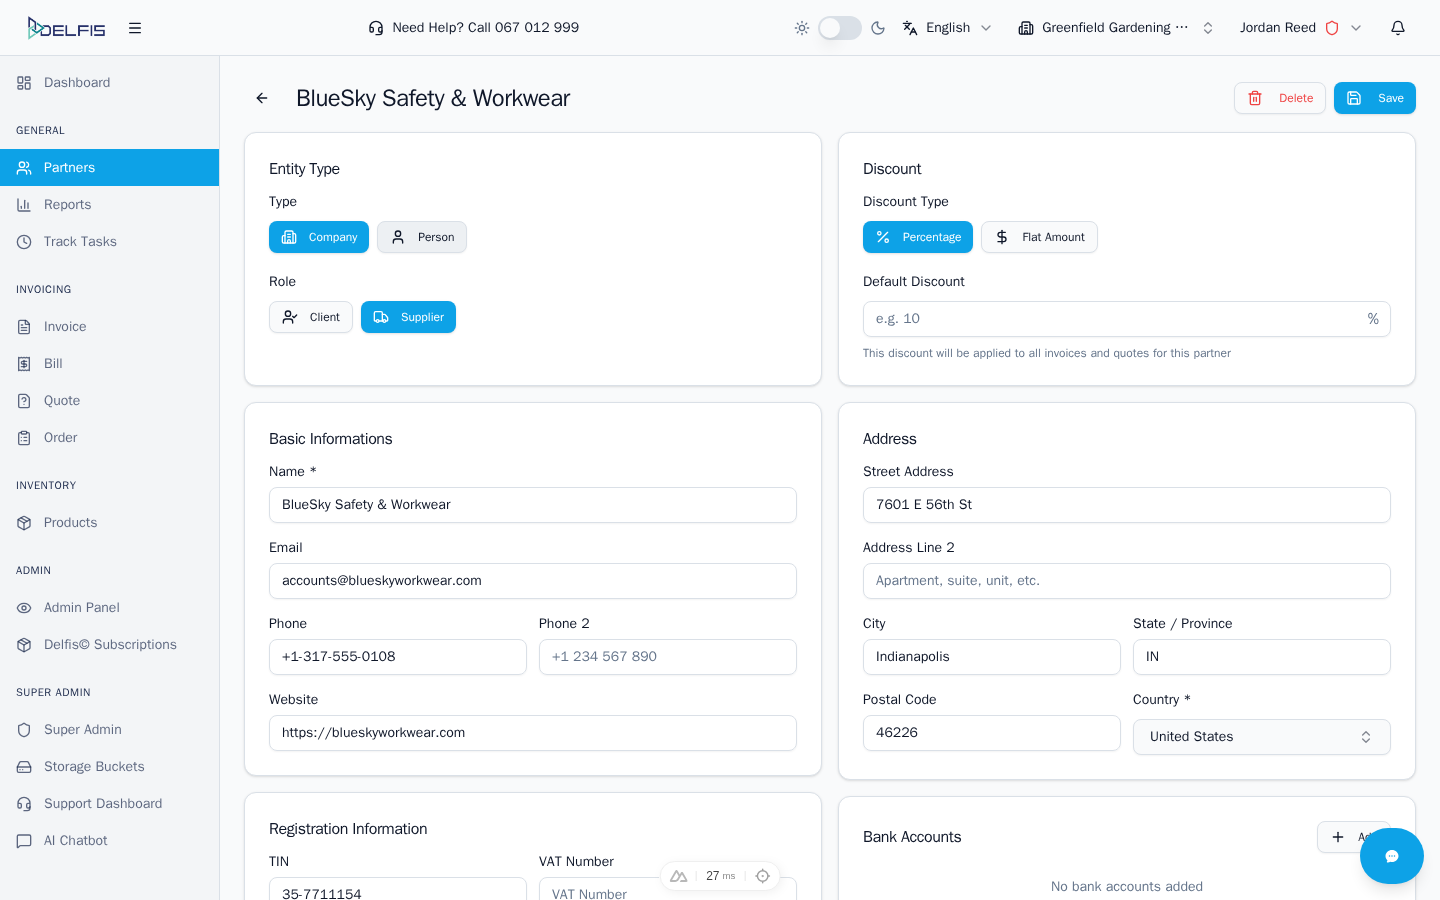
Page Header
The header displays:
- Partner name - The company or person name
- TIN - Tax Identification Number (if set)
- Delete button - Remove this partner
- Save button - Save changes (enabled when you modify data)
Entity Type & Role
Entity Type
Switch between:
- Company - Business entity with tax fields
- Person - Individual without tax requirements
Role
Toggle roles on or off:
- Client - For sales documents
- Supplier - For purchase documents
Both roles can be active simultaneously.
Default Discount
Set a discount that's automatically applied when creating documents for this partner.

Discount Type
- Percentage (%) - Percentage off the total
- Flat Amount ($) - Fixed amount discount
Discount Value
Enter the discount amount. For percentage, values 0-100 are accepted.
Note: The discount applies automatically but can be overridden on individual documents.
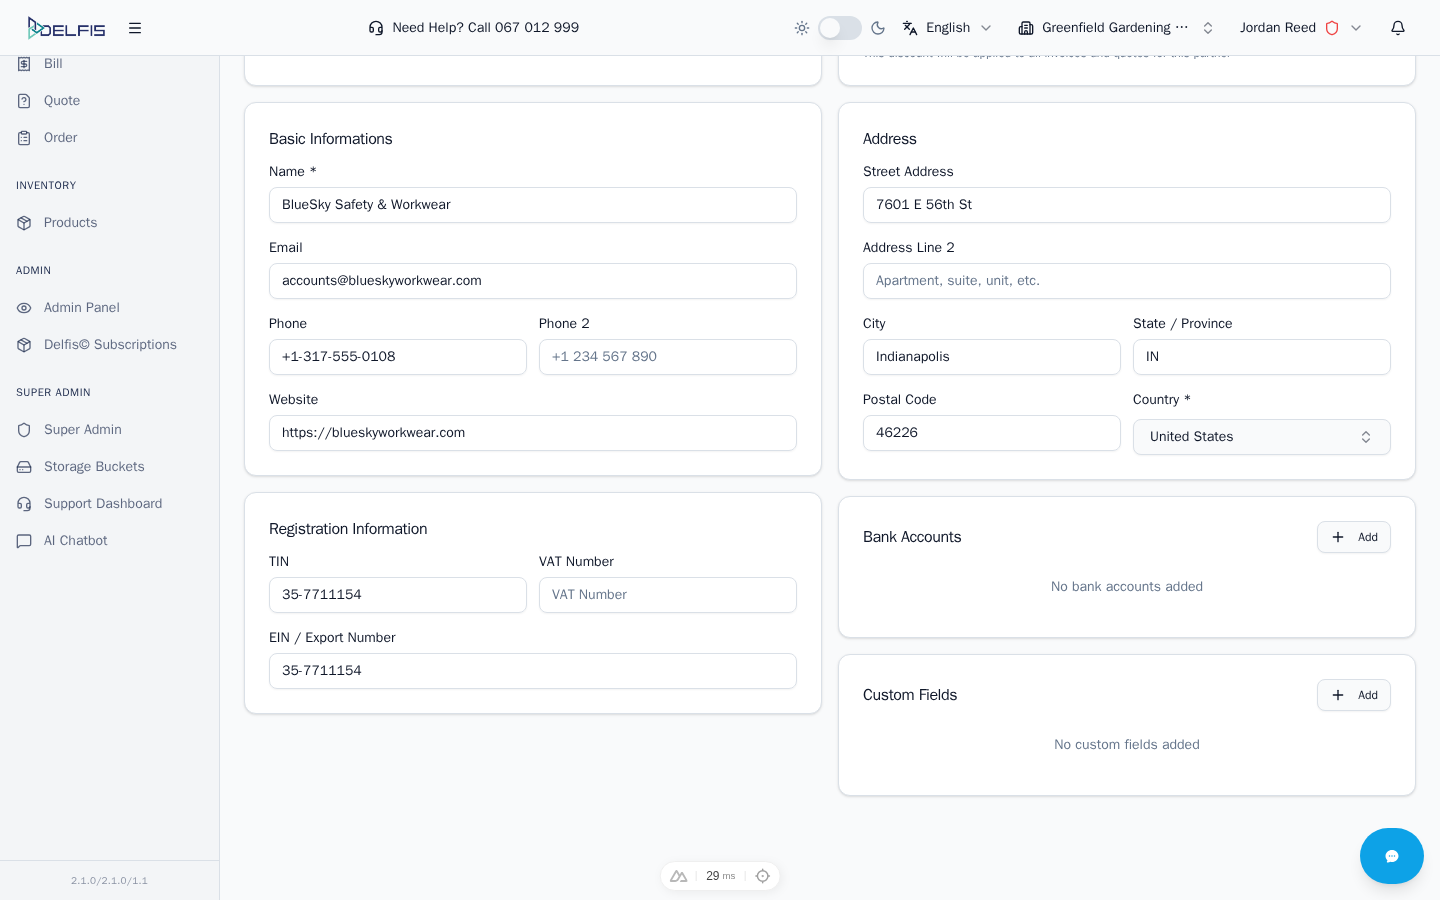
Basic Information
Edit the partner's core contact details:
| Field | Description |
|---|---|
| Name | Company name or full name (required) |
| Primary email address | |
| Phone | Primary phone number |
| Phone 2 | Secondary phone number |
| Website | Company website URL |
Registration Information
For company partners, manage tax registration details:
| Field | Description |
|---|---|
| TIN | Tax Identification Number |
| VAT | VAT registration number |
| EIN | Employer ID / Export number |
This section only appears for Company type partners.
Address
Manage the partner's address:
| Field | Description |
|---|---|
| Street Address | Primary address line |
| Address Line 2 | Additional address info |
| City | City name |
| State/Province | State or province |
| Postal Code | ZIP or postal code |
| Country | Searchable country dropdown |
Country Selection
The country field is a searchable dropdown:
- Click the country field
- Type to search
- Select from matching results
- Click to confirm selection
Bank Accounts
Store the partner's bank account information for payment reference.

Adding Bank Accounts
- Click + Add next to "Bank Accounts"
- Enter the Bank Name
- Enter the Account Number or IBAN
- Repeat to add more accounts
Removing Bank Accounts
Click the X button next to any bank account to remove it.
Use Cases
- Reference when making payments to suppliers
- Verify client payment details
- Store multiple accounts for different currencies
Custom Fields
Add any additional information specific to your needs.
Adding Custom Fields
- Click + Add next to "Custom Fields"
- Enter a Field Name (label)
- Enter the Field Value (data)
- Repeat for more fields
Example Custom Fields
| Field Name | Example Value |
|---|---|
| Industry | Technology |
| Account Manager | John Smith |
| Contract Number | CTR-2024-001 |
| Payment Terms | Net 30 |
| Loyalty Tier | Gold |
| VAT Exempt | Yes |
Removing Custom Fields
Click the X button next to any custom field to remove it.
Saving Changes
The Save button in the header:
- Appears disabled until you make changes
- Becomes active when any field is modified
- Shows a loading indicator while saving
- Displays a success message when saved
All changes are saved together when you click Save.
Deleting a Partner
To delete the partner:
- Click the Delete button in the header
- Confirm the deletion in the dialog
- You'll be redirected to the partners list
Warning: Deleted partners cannot be recovered. Ensure you no longer need the partner data before deleting.
Tips
Keep Information Current
Regularly update partner details to ensure documents have accurate information.
Use Custom Fields Wisely
Create consistent custom field names across partners for better organization.
Set Discounts Early
Configure default discounts during initial setup to streamline document creation.
Document Bank Details
Store bank information even for clients - useful for refunds and payment verification.
Next Steps
- Creating Invoices - Use this partner in an invoice
- Managing Partners - Return to the partners list
- Creating Partners - Add another partner